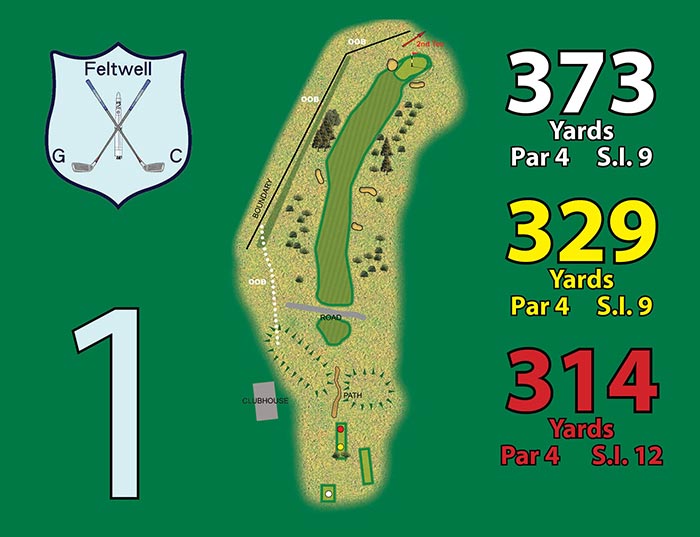
1st : Par 4 White: 373 Yellow: 329 SI: 9 Red: 314 SI: 12
Positioning of the tee shot is important here. The left side of the fairway gives you an ideal angle onto the green. Be careful not to leak your approach shot to the right as a deep bunker awaits!
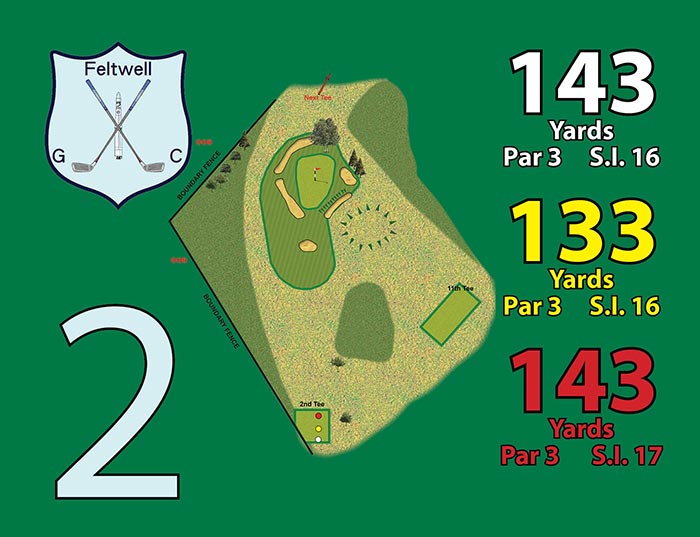
2nd : Par 3 White: 143 Yellow: 133 SI: 16 Red: 143 SI: 17
Approach to the green is well protected on all sides by bunkers, the bunker to the right is the deepest on the course. The green is generous in size but beware of its subtle burrows.
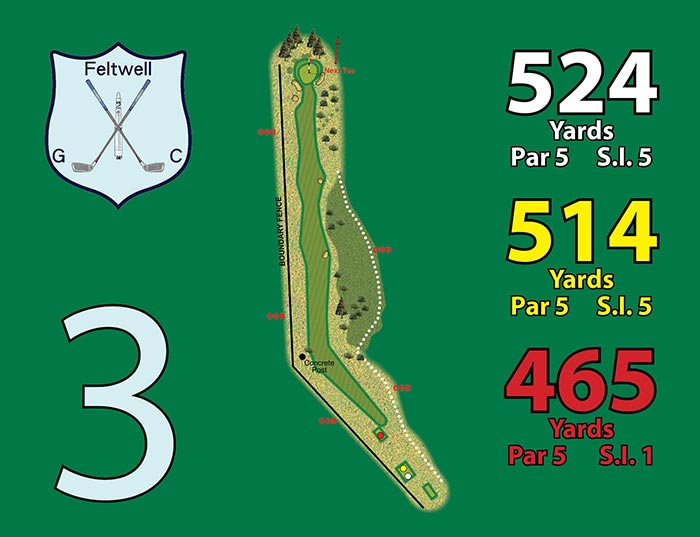
3rd : Par 5 White: 524 Yellow: 514 SI: 5 Red: 465 SI: 1
An intimidating tee shot with out of bounds to the right and left. Long hitters from the white and yellow tees can take the dangerous line over the tree at the angle of the dog-leg to give themselves a chance of reaching the green in 2 shots. Medium to short hitters should aim for the left hand side to avoid the worst rough and bunkers. Try to keep your approach below the hole on this sloping green as a downhill putt here is one of the fastest on the course.
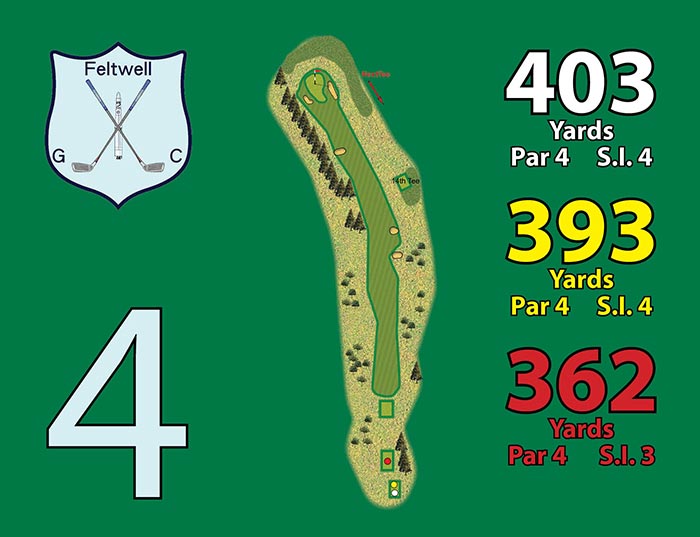
4th : Par 4 White: 403 Yellow: 393 SI: 4 Red: 362 SI: 3
A strong Par 4. Be careful to avoid the hidden fairway bunkers on the right hand side of the fairway. Right of the green is not the place to go with approach shot as you will find a wickedly sloping bunker or face a pitch onto a downhill sloping green.
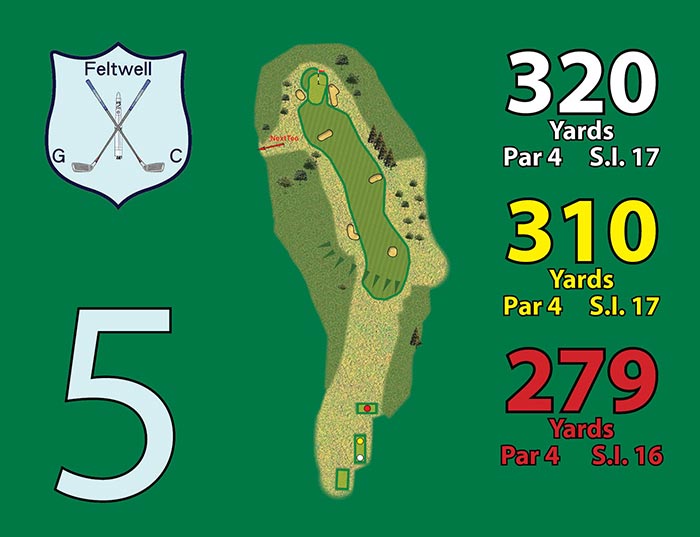
5th : Par 4 White: 320 Yellow: 310 SI: 17 Red: 279 SI: 16
A strategic short Par 4. Long hitters can find the left hand side of the fairway to leave a short-iron approach. The putting surface slopes from front to back so it easy to go through the green with your second shot, long rough awaits you to the right of the fairway and behind the green.
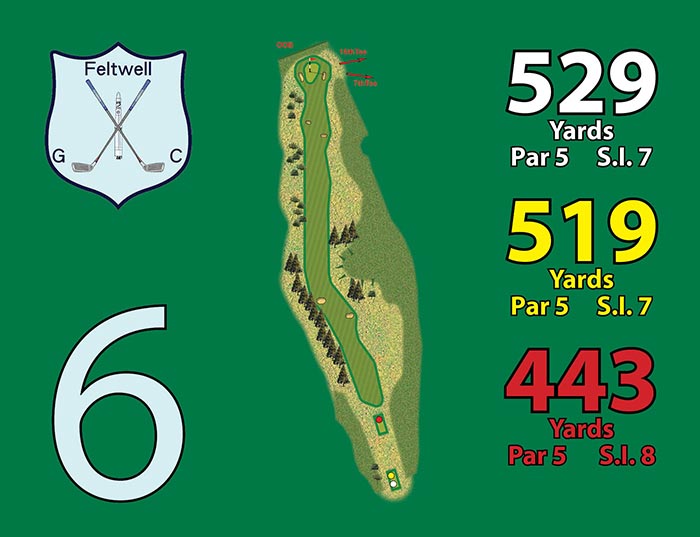
6th : Par 5 White: 529 Yellow: 519 SI: 7 Red: 443 SI: 8 Hidden fairway bunkers to the left and right await. A straight drive will give a birdie opportunity and beware the rough on the right of the fairway.
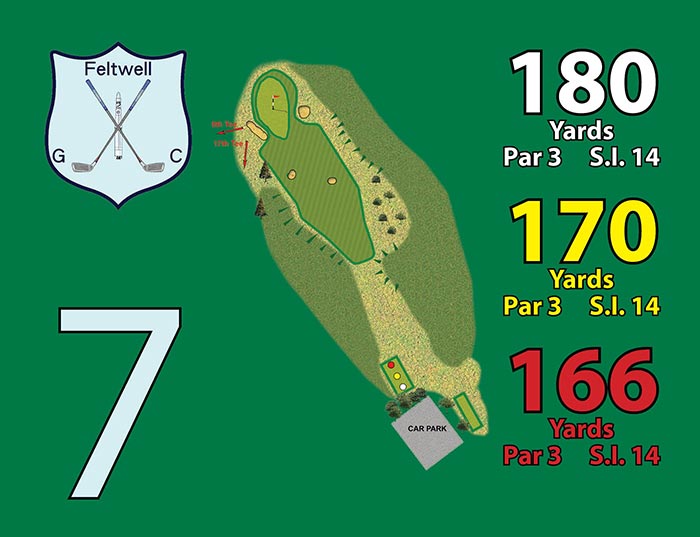
7th : Par 3 White: 180 Yellow: 170 SI: 14 Red: 166 SI: 14
A well protected green. The slopes on the green make a par a good result.
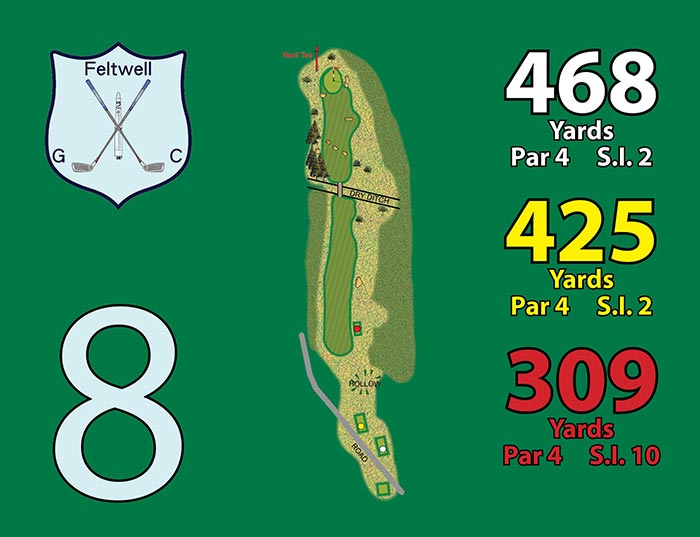
8th : Par 4 White: 468 Yellow: 425 SI: 2 Red: 309 SI: 10
Rough to the left and right and a long approach shot needs to be well struck to avoid six bunkers approaching the green.
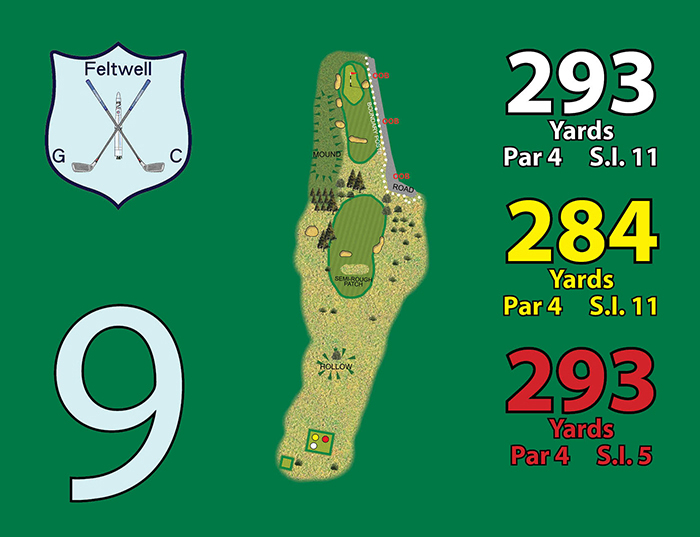
9th : Par 4 White: 293 Yellow: 284 SI: 11 Red: 293 SI: 5
A tricky short Par 4. A straight tee shot will leave a short approach to a green protected by out of bounds to the right and deep bunkers on the right and left of the green.
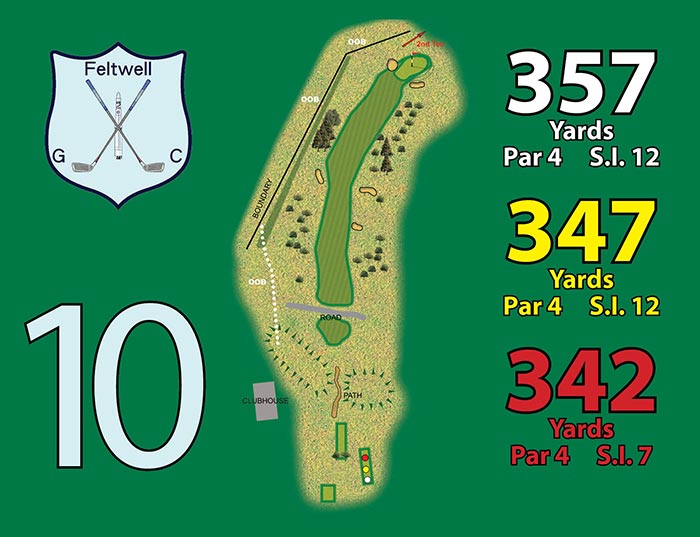
10th : Par 4 White: 357 Yellow: 347 SI: 12 Red: 342 SI: 7
Any drive drifting down the right hand side will leave a tough approach shot over the large green-side bunker. The left side is favourable but beware of out of bounds on the far left.
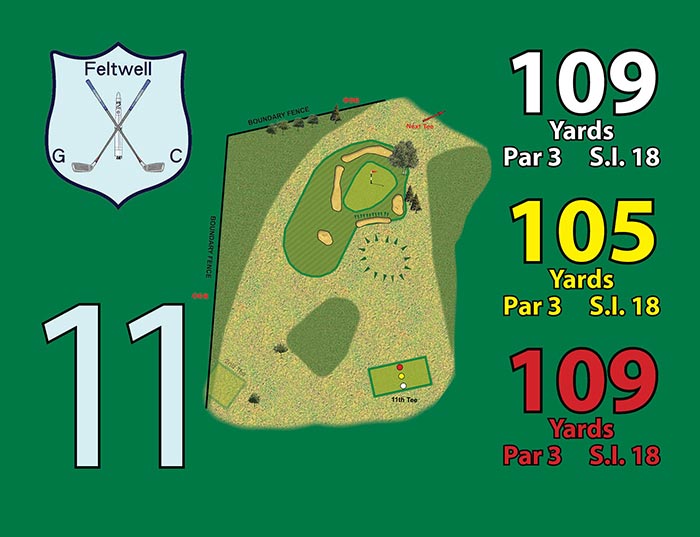
11th : Par 3 White: 109 Yellow: 105 SI: 18 Red: 109 SI: 18
Only just over 100 yards long but a very dangerous hole! Anything landing short of the narrow green will be caught by the deepest bunker on the course.
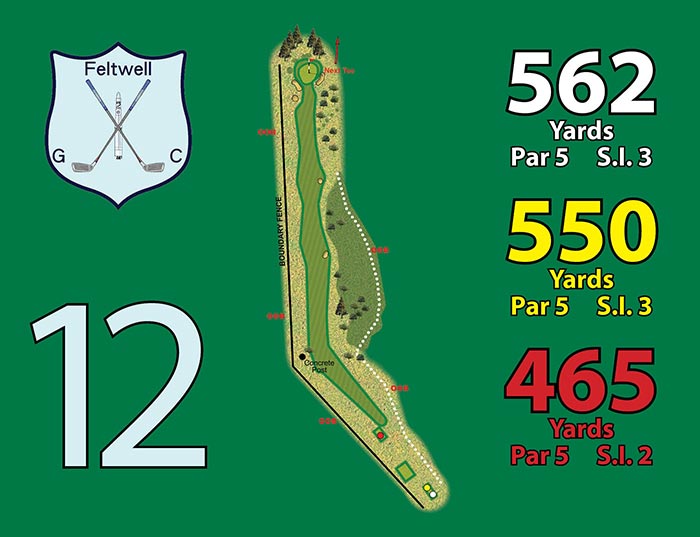
12th : Par 5 White: 562 Yellow: 550 SI: 3 Red: 465 SI: 2
Played against the prevailing wind, this is a true 3 shot par 5. Out of bounds left and right for both the tee shot and the second shot make accuracy vital.
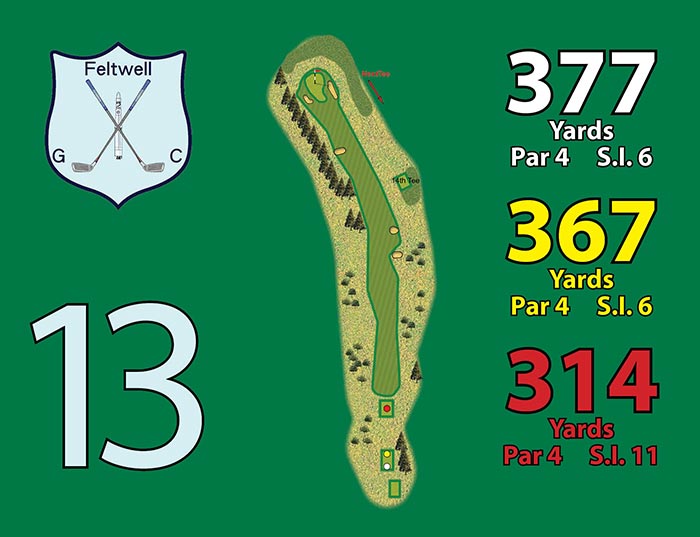
13th : Par 4 White: 377 Yellow: 367 SI: 6 Red: 314 SI: 11
Long hitters will be able to shape the ball around the dog-leg here but take on too much and the trees on the left hand side will block your route.
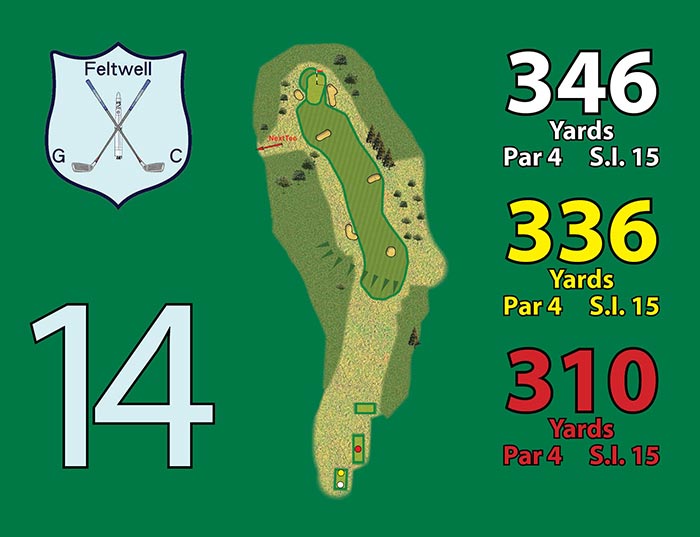
14th : Par 4 White: 346 Yellow: 336 SI: 15 Red: 310 SI: 15
The safe tee shot is down the right hand side but will leave a longer approach shot from a more difficult angle. Anything short on the left will find heavy rough.
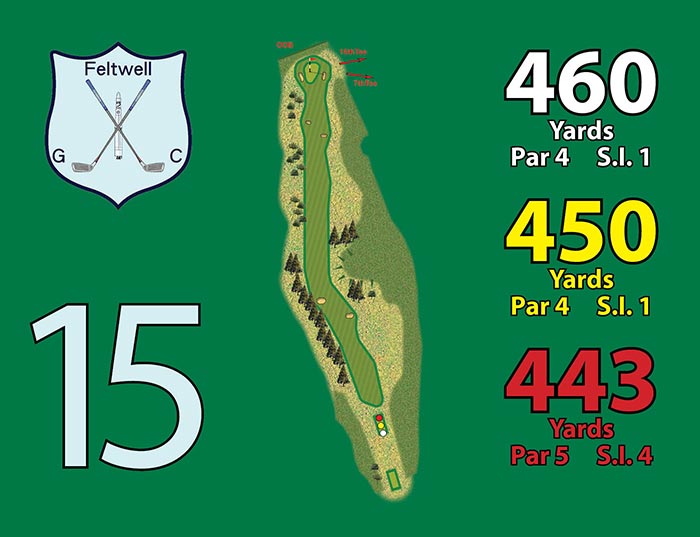
15th : Par 4 White: 460 Yellow: 450 SI: 1 Par 5 Red: 443 SI: 4
The most difficult hole on the course, a long Par 4, for the men. To have a chance of reaching the green in 2 shots, the drive must carry the large mound on the right but beware the rough beyond that on the right.
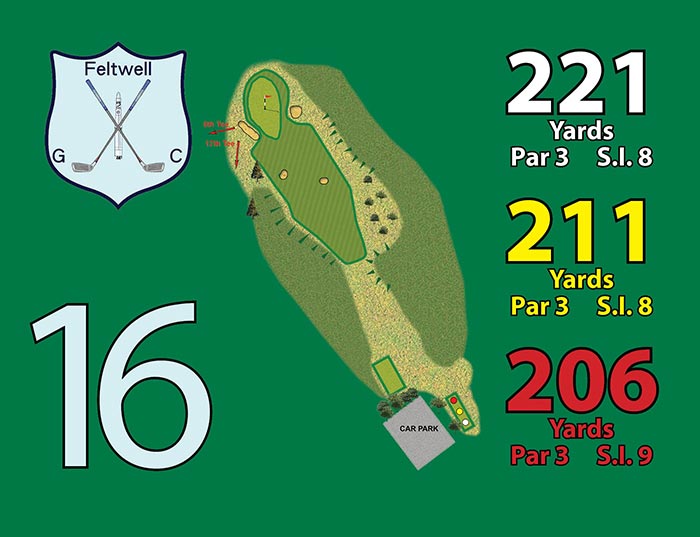
16th : Par 3 White: 221 Yellow: 211 SI: 8 Red: 206 SI: 9
A brute of an uphill Par 3. Missing the green to the left will leave a very difficult pitch to a downhill green.
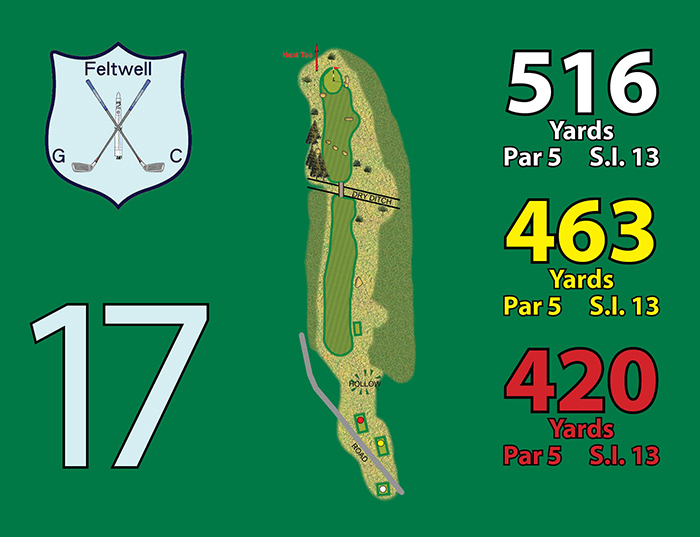
17th : Par 5 White: 516 Yellow: 463 SI: 13 Red: 420 SI: 13
A dangerous drive from the back tees must make a 150yd carry over a deep pit. Some deep cross bunkers and a dry ditch will catch any poorly struck approach shots or a badly judged lay-up.
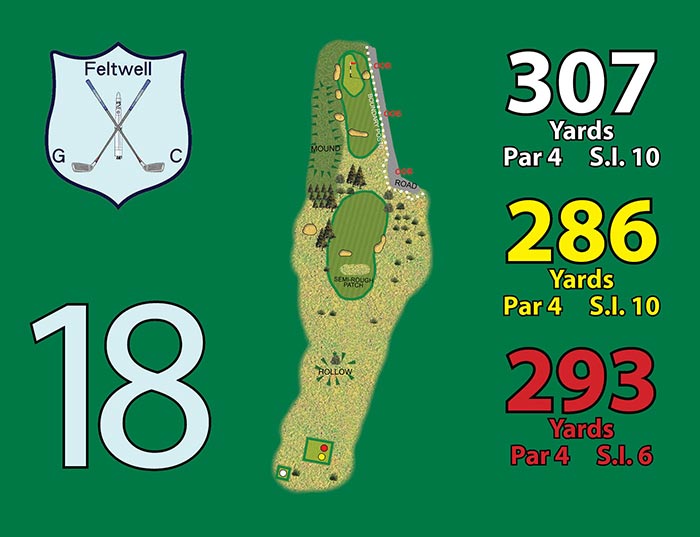
18th : Par 4 White: 307 Yellow: 286 SI: 10 Red: 293 SI: 6
Out of bounds only a few yards from the right side of the approach and the green, with deep bunkers either side of the green and long grass beyond the sloping green.